Part 2 – Glue Up – Bread Board Ends
Part 3 – Butterfly Joinery – Prepping the Legs
Part 4 – Mortise and Tenon Joints – Understructure
This table has turned into a major project. I knew that I was taking on a professional-level job, but I also, quite ignorantly, thought it would only take a couple of days. HA. As you read in Part 1 of this post, I want a table that looks professionally crafted. That means quite a lot more work than a table that looks home-made. Not just a little more work, as many people think. It takes a freaking ton of extra work to make everything fit together perfectly and smoothly. If you want a really nice piece of furniture, it really IS worth all that extra money (or time in my case). This post is about the process of glueing the table top together and attaching the bread board ends.
Just as I’ve done before, I used my router and a biscuit slot cutter to cut slots every six inches on each side of the boards. Due to the large size of this table and its incredible mass, I stepped it up to #20 biscuits.
Also because of its large size, 34 inches across, I glued the table in three parts using my hand clamps.
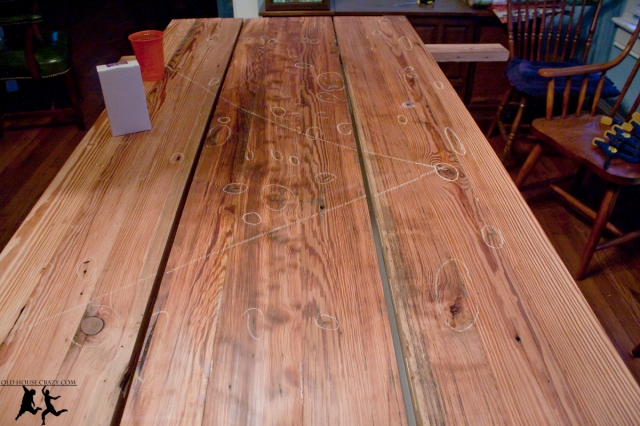
I don’t have any pictures from Don’s workshop where he helped with the final glue-up, but it involved large clamps and way less glue than I had expected. You can see in the picture above that I drew a large V across all of the boards to aid when fitting them together for the final glue-up.
In order to make the table long enough to seat 8 people comfortably, I had to add bread board ends, which consist of a single board attached to the ends of the table across the grain, or perpendicular to all of the other boards. I needed to add the bread boards because our shortest board was a few inches too short. Since we’re using reclaimed wood, we have to make adjustments to fit what we’ve got.
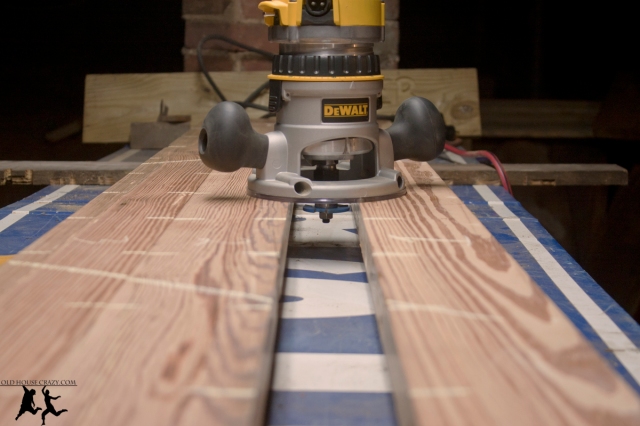
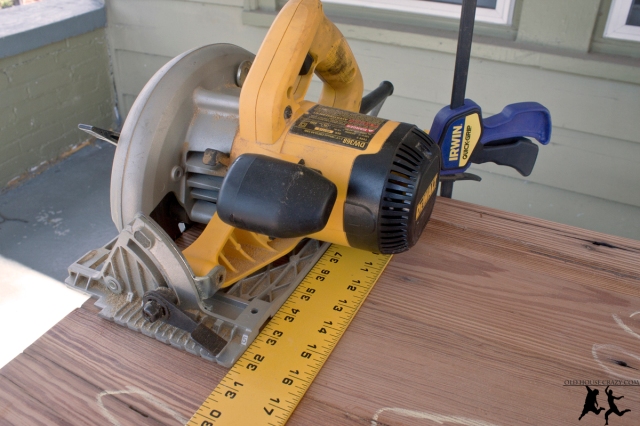
After the glue up, the boards were all wonky and neither end was flush, so I used the circular saw and a clamped straight edge (the yellow ruler) to cut them mostly flush. The circular saw does a crappy job of making clean cuts, so I went back over each end with the router and a straight bit to make the cuts perfectly straight and clean.
Now on to bread board ends. The bread board consists of a single board connected perpendicularly to the rest of the table top boards. Its purpose is to keep the table top from warping over the next several hundred years (because good furniture lasts that long). Table tops will do this as the grain flattens: all those circular lines in the end grain of a board will eventually work themselves flat if given the chance.
Rather than just glueing a board to the end of the table, the bread board is attached using a long tongue and groove joint. First, I used my router’s straight bit and an edge guide to cut a groove one inch deep down the center of each bread board. To reduce the stress on the bit, I made the cut in several passes of no more than 1/4″ depth.
Once the groove was cut, I measured the distance I’d need to cut off of the top and bottom of the table to make the tongue. It’s very important to cut the groove first, as it’s much easier to make a custom tongue to fit a groove than the other way around. I actually didn’t get the groove in exactly the center of each board, so the amount I needed to cut out of the top and bottom of the table was different.
Above, you can see where I removed the waste from the top of the tongue. Below, you can see how the tongue fits into the groove. There are several things to note here: 1. The tongue does not go all the way to the edge of the table. Once attached, the joint will not be seen. 2. The tongue does not go all the way to the end of the groove either. This brings us to the most important part of properly attaching bread boards:
Believe it or not, wood moves as the seasons change. If you’ve got an old house, you know this. Our floors creak differently in the winter than they do in the summer. Our fence gates and exterior doors fit differently in their frames. Tables and other large furniture actually get bigger and smaller with the seasons. In the case of long tables, they can grow by half an inch or more across the grain (they get wider, not longer). This is all due to the relative humidity in the air as the seasons change. More moisture causes wood to swell. Less moisture causes wood to shrink. It’s very noticeable here in Atlanta.
Whenever you attach bread boards to a table, you’ve got to account for the movement of the wood. If you simply glue the bread board all the way across, the table can crack and fall apart. That would be bad. So don’t do that.
The technique I read about, and that Don elaborated on, was to use dowels. I drilled three holes through the bread boards from the bottom, making sure to hit both side of the groove as well as the tongue. I used my router and its plunge base since I wanted the holes to go straight through. I could have used a drill, but I don’t trust myself to drill straight down without wobbling. I also don’t have a forstner bit, which is preferred.
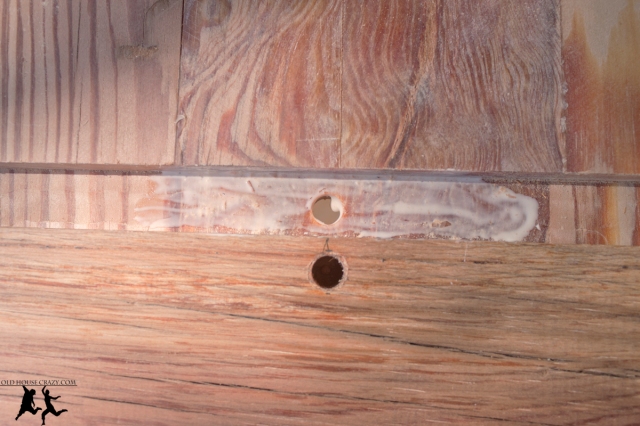
Typically, the center dowel is glued all the way through the hole, as there shouldn’t be any movement directly in the center of the table. On each end, however, I used a file to widen each of the holes in the tongue so that it was oblong. This will allow the dowel to move from side to side as the table grows and shrinks.
I applied glue to the center 5 inches or so of the tongue and squeezed the bread board onto the end of the table.
In went the center dowel, glue applied to its entire length.
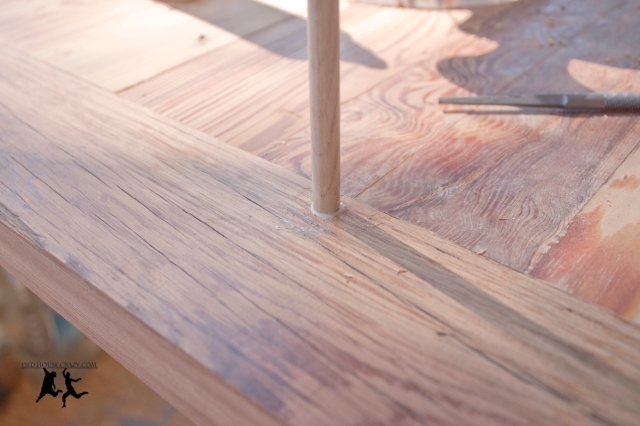
I used a flush saw to cut the dowel close to the table. Later, I’ll sand it down. I repeated this process for each of the outer dowels, but only applied glue to the very last bit of dowel so that it is only glued into the bottom of the groove, not to the tongue. This should allow for wood movement in the years to come.
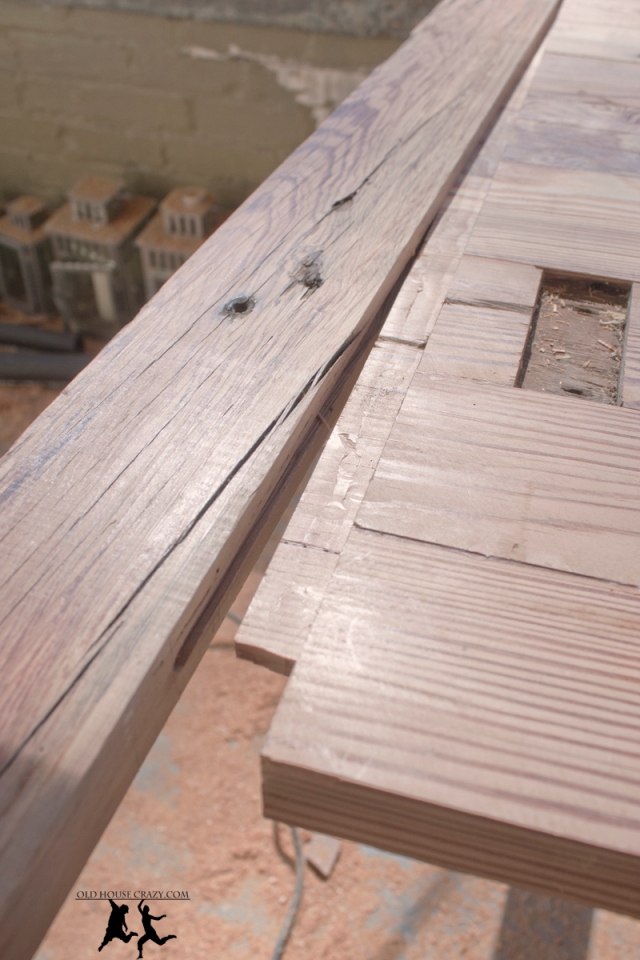
The final photo is after I cut the bread boards flush with the sides of the table, but before I sanded and cut a bevel onto the edge. More on all that later. Thanks for reading. -Robby









Nice table! I like how you explained how attach the bread board ends. Keep up the cool work!
Pingback: Reclaimed Heart Pine Farmhouse Table – DIY – Part 4 – Mortise and Tenon Joinery – The Understructure | Old House Crazy
Pingback: Reclaimed Heart Pine Farmhouse Table – DIY – Part 3 – Butterfly Joinery and Prepping the Legs | Old House Crazy
Pingback: Reclaimed Heart Pine Farmhouse Table – DIY – Part 1 – Milling Old Lumber | Old House Crazy
After much much research on attaching breadboard ends, yours makes more sense than any I’ve found. Thank you.
Thanks, Jerry. I’m glad the post was helpful.
This is a really interesting process. I appreciate the explaination regarding the dowels and wood movement. I agree; super important step. I’ve seen large dowels inserted through the side of the bread board into the end grain of the table top pieces. That’s in a table purchases from a local Amish furnature store here in Wisconsin. Your technique will allow for more movement and the dowels will be hidden underneath the table top. Nice work!
Pingback: Reclaimed Heart Pine Farmhouse Table – DIY – Part 5 – Final Assembly | Old House Crazy
Reblogged this on Soğuk Kuş Etkisi.
very interesting great post! – questions:
– obviously the dowels do not penetrate the top, but are they glued to the top groove as well, so that they are glued top and bottom of the BB groove but not the tongue?
– i am about to build my 2nd farmhouse table using antique pine flooring, and considering having the dowels fully penetrate for aesthetics – any reason this would not be ok to do? of course if i do it would have to be glued to top and bottom of groove.
– on my first table, i simply deepened the existing groove on the BB (since it was old flooring it was all tongue and groove) and cut a tongue to fit on the ends of the table. with this, the T&G extends the whole length of the BB and width of the table, and is visible on the ends. i can see both opinions – “buried ” T&G so it doesnt show at all or full, i think the joinery looks good, plus it is a whole lot easier to cut using a dado head on a table saw. anything bad about this?
on my first table i attached the BB using a Kreg jig and pocket screws, so it is attached firmly. i suppose after a full year of climate fluctuations i will see if there are any issues. i am hoping the poly finsh (4 coats) will have it pretty well sealed and movement will be minimized. October to Feb and all is well so far. This table went to my daughter, so I can always repair if anything happens, but I am about to make the 2nd for a client so I obviously have to get it right the first time….
thanks for a great post and food for thought!
David
The bread board end had got to float, our have space to expand. If you glue all the way through or screw it down firmly, it will lead to problems down the road. Native not next year or the one after, but eventually, the table will crack.