

This is the planter after about two months of growth and a coat of cedar stain and sealant.

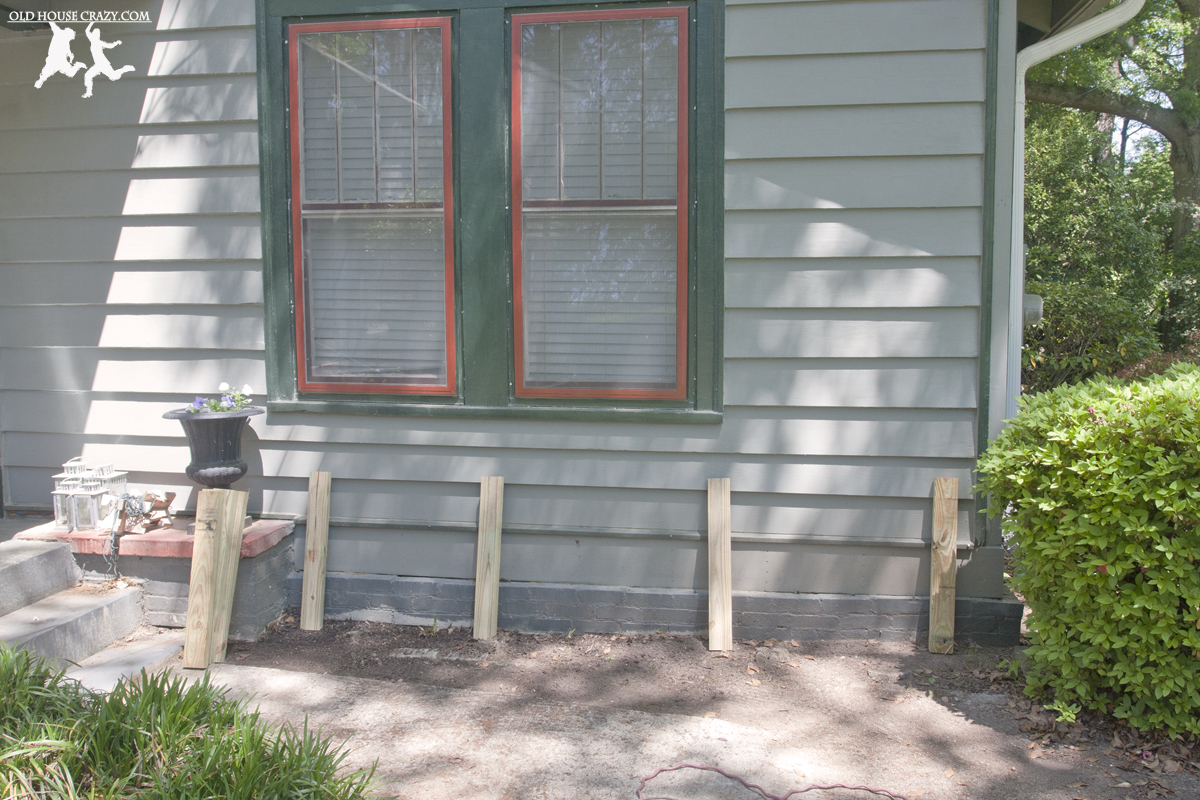
This space below the front windows between our sidewalk and house has been dead space for the last two years. It’s needed a facelift in a bad way.
Cost, Equipment, and Skills:
This project cost $230 in materials and dirt, plus another $80 in flowers from the farmer’s market. We used a mitre chop saw, a drill/driver, a circular saw, a level, a staple gun, and a sawzall. Materials were simple: 2×4’s, 1×4’s, 1 x 2’s, a sheet of thin plywood, some 4 mil plastic, six cubic feet of dirt, and wood screws. This project was completed comfortably in one weekend. Our story, tips, and insights are in the blog post. Quick instructions are in the photo captions.

Christy started us off by cutting 2×4’s into 12 verticals that would provide the support for the planter.
The Story:
Christy and I have been married for five years at the time of this post. For our anniversaries, we have enjoyed giving gifts that are traditional for each anniversary year. The fifth anniversary gift is traditionally wood, so I was naturally excited to build a new something. Months ago, we talked and I decided to build Christy a rolling island cart for our kitchen from heart pine and walnut. Christy had a bit more difficulty thinking of what to give me, as I’m the woodworker in the family. A few weeks before the anniversary, Christy asked me what I might like, with some frustration in her voice. Since I had been a bum and hadn’t started the island yet, we decided to build something together as a joint gift to each other. We agreed it should be this project, a two-tiered flower planter to cover about twenty square feet of dead space in the front of our home. I bet that most of you can think of at least one place around your home that could benefit from a similar upgrade. We’ve actually already found another place around back that could use a planter.
We laid the 2×4 verticals against the wall and then laid a full 10 foot 2×4 along the ground to attach them. We were careful to space the verticals evenly along the ground, but it doesn’t really matter since they’re hidden when the project is done.
This particular spot is directly adjacent to our front sidewalk, contains a very thin strip of bad dirt and a thicker strip of concrete, and used to contain a few scrawny boxwood bushes. We cut the bushes down when we had some termite damage repaired two years ago. Since then, this spot hasn’t exactly detracted from our home’s appearance, but it certainly hasn’t added any value or curb appeal. We first talked about building a planter here over a year ago, and it’s been on my man-list for that time, but we just haven’t gotten around to it.

We used clamps to attach the verticals to the 10′ 2×4 that ran along the ground. This allowed us to make sure everything was level and square before we used any screws.
Do I need a Pro?
When I look at the photo of the finished product at the end of this post, I think it looks very well planned and constructed. I may be a little biased, but that’s not my point. My point is this: You don’t have to be a pro contractor to make things that look nice. I drew up a sketch of this planter on a piece of paper after thinking about it for two hours (over breakfast, coffee, and rocking chair time). I then made a list of materials based on my sketch, knowing that boards come in standard sizes and accounting for a few extra (I always buy a couple extra 2×4’s). I’ve done a few projects like this before, so I was pretty close on my estimates and we didn’t need six extra trips to the hardware store. If you plan something like this for your home as your first project, you will absolutely leave something off the list and will need to make a few extra trips. But you can do it. Projects like this are structurally pretty simple. If you’ve got a few tools and are willing to give it a go, you can get it done. You’ve just got to keep your chin up and go back to the store for the 12th time.

After the front was done, we moved on to the back row of verticals, which are taller than the front row since it’s a two-level planter.
Building the Planter:
Look back at the first photo of the dead space. It’s not exactly a rectangle. We wanted the planter to fill the whole space, but not-exactly-rectangle is a hard shape to build out of wood. It requires mitre cuts and stuff. Well, we actually got away with not making a single mitre cut while building the base of this planter, and it still fills the whole space. The reason? Pressure treated pine.
As with any construction project, the base is wobbly until you strengthen the top. We attached two 10′ 1×4’s along the top edge. These made up the sides of the flower baskets.
Most of the time, when I buy treated lumber, it’s still wet. This can be really annoying if you’re building something with very precise measurements because the lumber will shrink as it dries. However, when building something out of square, wet lumber is quite nice. It bends and twists just a little where you need it to. Look at the photos above and below this paragraph. You can see that the 2×4’s are screwed together using normal square joints on that end, but the horizontal boards are anything but parallel.
We didn’t have to be all that careful making sure that all of the 2×4’s were exactly the same height from the uneven ground because we attached the 1×4’s perfectly level.
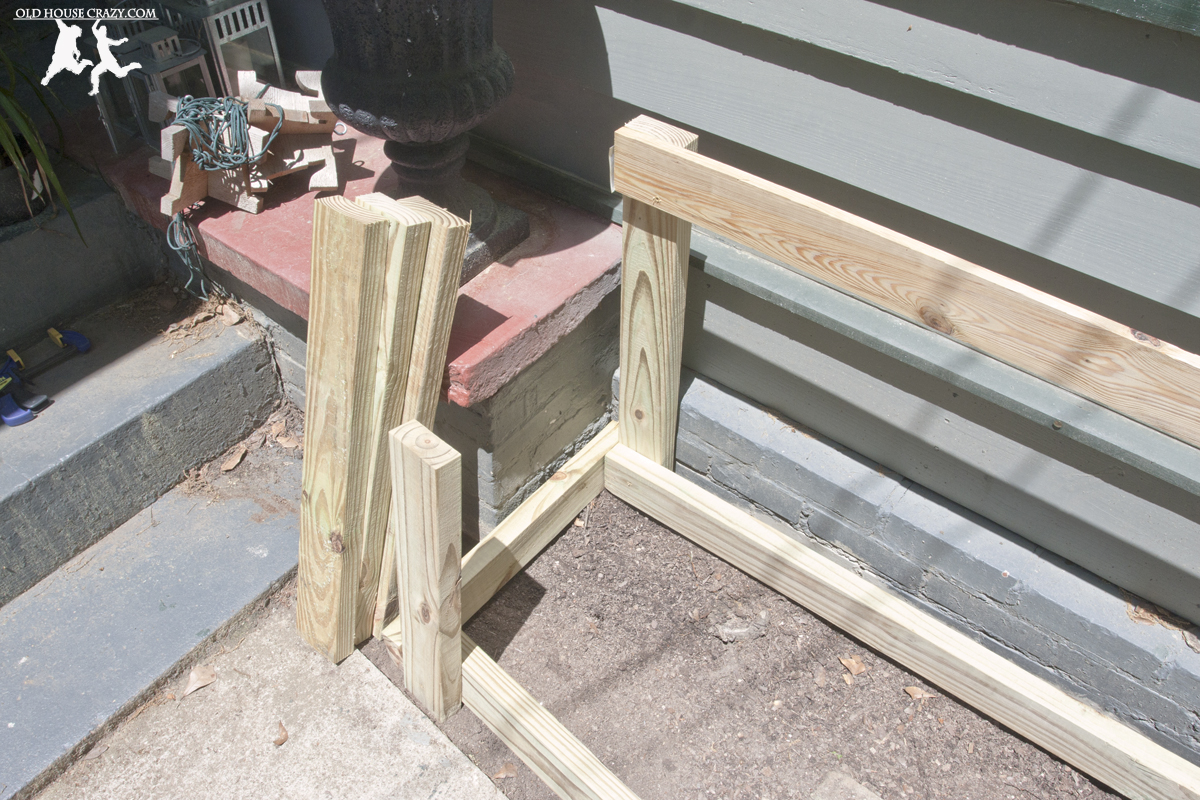
To get started, we figured out how tall we wanted each of the levels of our planter to be. We used the front of our house as a guide and said something like “we want the top of the upper planter box to come halfway up this siding board”. That’s how we chose how long to cut the vertical supports. It was something like 20-inches, but you can make yours however tall you want it to be. We cut (8) 2×4’s to that length. This would give us two rows of supports, one along the house and one in the center of the planter’s structure. Look at the photo below to see the two rows of tall vertical supports. We then cut (4) 2×4’s to a shorter length. I think it was around 14″. These made up the front supports for the lower planter box. You can see them leaning awkwardly in the photo below, kinda like a dude going in for that first kiss.

The upper flower box has taken shape. You can see the lower verticals are leaning in because they don’t have any support at this time. They’ll be solid once we brace them.
To start the actual build, we laid the tall vertical supports out along the wall of the house and laid an uncut 10′ 2×4 horizontally along the ground. Using clamps, we attached the verticals to the horizontal at even intervals along the ten foot length. Since you can’t see any of the verticals in the finished product, it doesn’t really matter how you space them. I just like to distribute the weight of the dirt and water evenly and it’d bother me to know they were uneven. Once they were even and truly vertical, we screwed the boards together using 2.5 inch exterior wood screws.

Now we’ve got the 1×4’s cut and attached to frame out the lower flower box as well. The upper box is 10 inches deep from end to end. The lower box is built to fit the space, so it gets deeper from left to right.
Important Design Note: You can see in the photos that the vertical support boards are attached on the exterior of the horizontal boards. That was not an accident. Attaching them this way keeps the verticals from interfering with the smooth look of the flower boxes AND it gives an uninterupted space for the siding boards to be attached as one of the last steps. Pay careful attention to this type of detail when building things. I’ve had to disassemble many projects because I didn’t think about where a support went. It won’t destroy your final product, but it’s annoying when you get it backwards and have to start over.
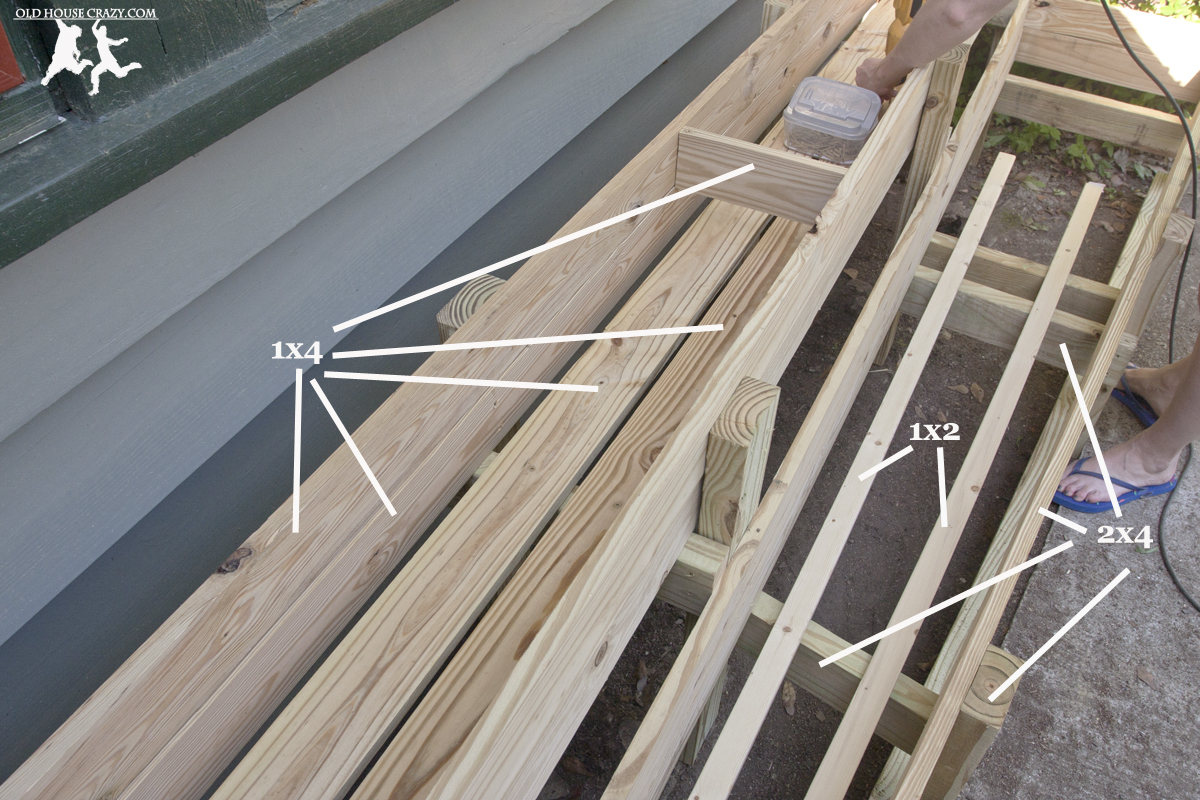
We attached 2×4’s horizontally between the verticals to support the floor of the flower boxes. The upper box is lined with 1×4’s. The bottom is lined with 1×2 strips. We then cut 1/4″ plywood to fit the lower box.
After we had screwed the vertical supports to the horizontal ground boards, we attached two 1×4’s all the way around to the INSIDE of the verticals, one above the other. These 1×4’s make up the sides of the flower boxes themselves, giving the boxes a depth of about 8 inches. You can also see, in the photos above and below, that we cut a 10″ section of 1×4 to wedge in the middle of the upper box. This kept the long boards spread evenly, especially while we were still bracing all of the verticals.

We added a few more strips.
Next, we needed to add the bottoms of the planter boxes. For both the upper and lower planters, we cut 2×4’s to length and attached them between the three rows of vertical supports, perpendicular to the planter boxes. On top of the 2×4 supports, we screwed down 1×4’s in the upper box and 1×2’s in the lower box. You can see all of this in the two photos above this paragraph. The 1×4’s were the final support for the upper box, but for the lower box, we needed something more. We bought a sheet of thin plywood and cut it to fit the odd shape of the bottom planter. You can see it screwed down on top of the 1×2’s in the photo below.

Here’s the lower box with plywood installed. We drilled a few holes in the plywood so that water would drain.
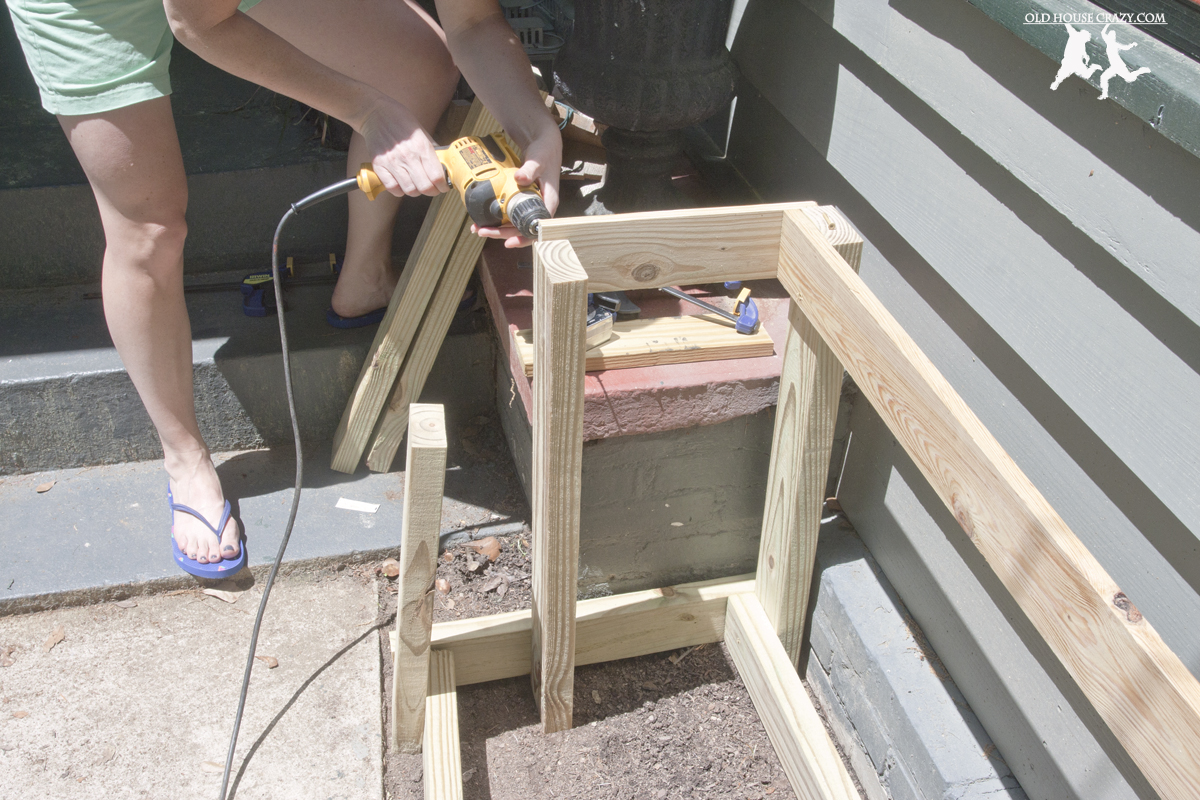
After the planter boxes were fully built, we used a sawzall to cut the verticals to the proper heights. Even though we cut them all to the same length, they still ended up being out of whack in the end because the ground is not level. We built the planter as planned, making sure that the horizontal boards were perfectly level, and corrected for the uneven ground afterwards. You can see Christy using power tools in the photo below.
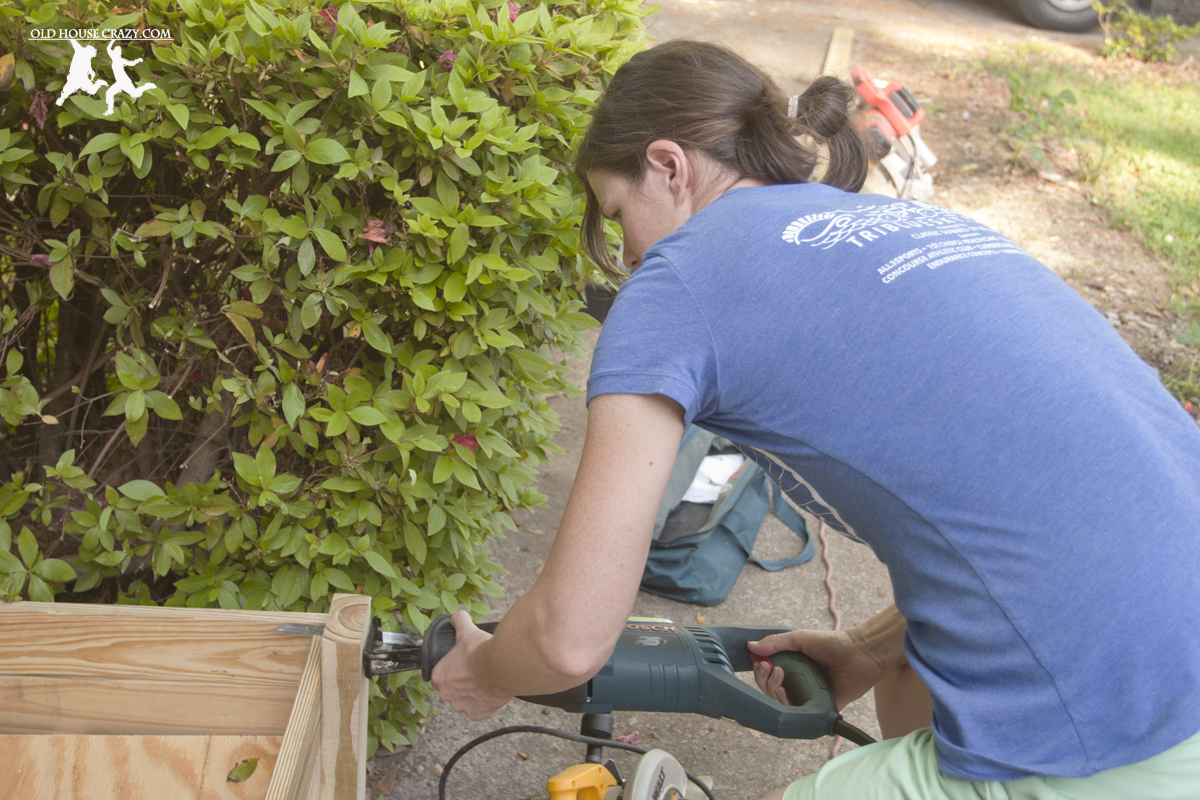
Since we weren’t all that careful with making sure the verticals were the same height, Christy came back with the sawzall and cut them even with the top of the flower boxes.
We decided that we wanted the planter to match our home, so we bought more 1×4’s to use as siding boards. While the siding on our house is 1×10’s, the 1×4’s look just fine and are much easier to work with on this smaller scale. We attached the siding boards the same way a builder attaches them to a home: starting from the bottom. The bottom board is screwed into the verticals so that it is flush with the ground. The second board is laid over the first so that it juts out at the bottom. We used one screw per vertical, screwed into the upper part of the siding board. This way, the next board covers up the screws so you have a very clean finished look.

We used more 1×4’s as siding. Starting from the bottom, we attached them with screws at each post.
When the siding boards were attached, we unrolled some 4-mil plastic sheeting left over from the crawlspace vapor barrier I installed. We crammed the plastic into the containers and stapled it down using a staple gun. The plastic holds in the dirt and keeps the wood from rotting as quickly.
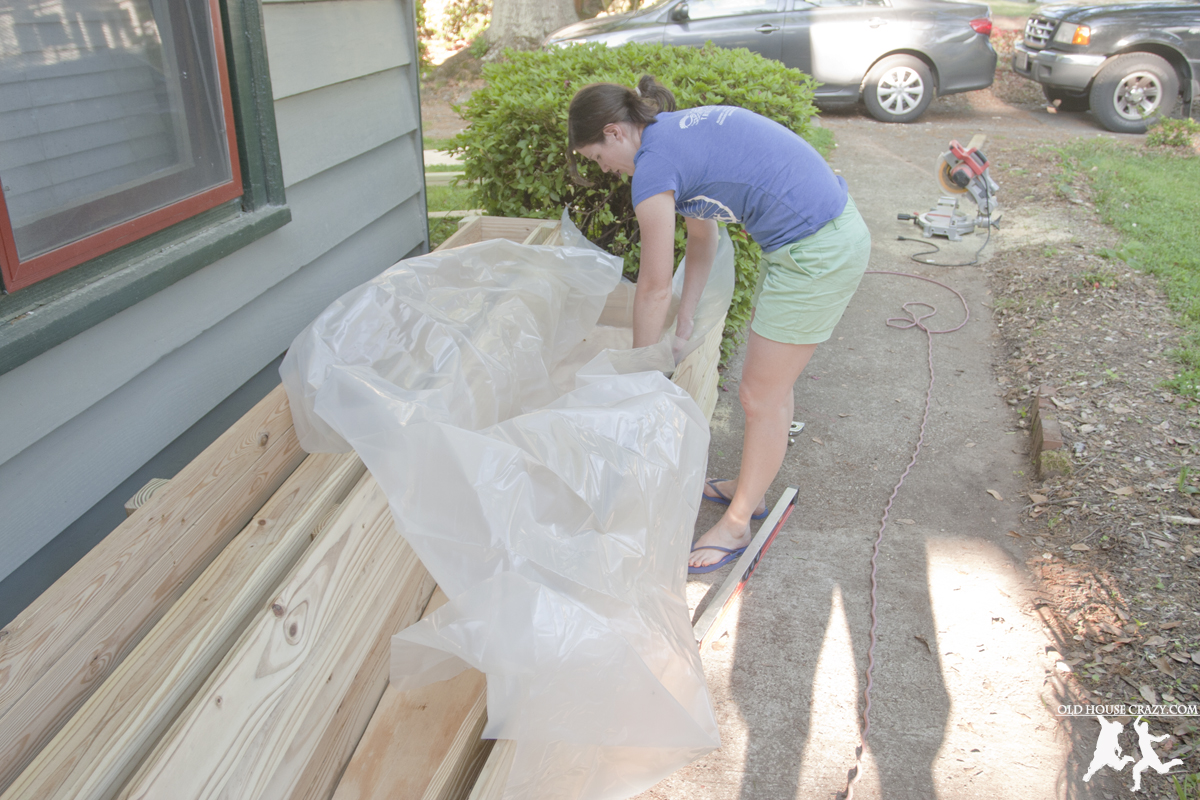
Once the siding was done, we lined the boxes with 4 mil plastic and stapled it down with a staple gun.
The final step of the construction was to cut some more 1×4’s to be used as cap rails. The caps cover the plastic and hide any imperfections from your build, like uneven supports, ugly wood, and bad joints. You can see them in the final photo at the bottom of the post. These boards are the only ones in this build that we cut using a mitre. If you don’t have a mitre saw, you can just lay the boards end to edge and it looks just fine.

Christy’s a pro with the staple gun.
It took six cubic feet of dirt to fill up the planter. It wasn’t totally full after we’d put in all of that dirt, but you’ve got to account for the dirt that your plants bring with them when you plant them. We went to the Georgia State Farmer’s Market near the airport for flowers and filled the planters completely up. We aren’t landscapers, so we didn’t really have a plan in mind. We just picked out a bunch of plants that do well in part sun and that looked pretty together. The photo below shows the planter after two weeks of growth. We are planning to paint the planter to match the house or foundation with grey siding boards and red cap rails. We’ll get those photos posted as soon as we paint. Let us know if you have any questions by leaving a comment below, emailing us at oldhousecrazy@gmail.com, or commenting on our facebook page. Thanks for reading. -Robby

1×4’s make good railings. After attaching them, we filled the boxes with dirt and planted flowers from the farmer’s market. This photo was taken about two weeks after we planted everything so there’s some nice growth on the Creeping Jenny.

Pingback: Home Upgrades Your Neighbors Won’t Hate You For · My Sweet Things