Paleo Fruit and Nut Loaf

If you know us IRL, you probably know that we periodically eat a paleo diet for a month or two to get ourselves back on a healthy track. Right now we’re on week 3 of an 8-week paleo “challenge” that several folks at our gym are participating in. We’ve been cooking up lots of paleo food, some old recipes that we cycle through over and over, and also experimenting with some new ones.
image

This fruit and nut loaf recipe has gone through a few revisions before getting it just right (to our tastes, anyway). Since we can’t use any sugar or fruit juice as a sweetener, we’ve had to get very creative/resourceful to make this taste like a comfort food. A slice of this loaf goes great with a cup of coffee in the morning, or makes a nice snack or dessert at night when you’re missing something sweet-ish after dinner. If you have a friend that’s trying out paleo, and maybe struggling at little as we did at first, this loaf would be a nice treat for him or her.
image

Ingredients

2 cups almond flour

1 cup coconut flour

1 3/4 tsp baking soda

1/4 tsp salt

2 fresh, ripe bananas with some brown spots (mashed)

2 tbsp coconut oil (melted)

1/2 tbsp vanilla extract

1/2 tbsp almond extract

2 large eggs, room temperature

1/2 cup chopped dates

1/2 cup chopped pineapple

1/2 cup chopped walnuts

1 tsp nutmeg

1 tsp cloves

1 tbsp cinnamon

1 tbsp honey (I use a raw honey that’s especially sweet)


image

Directions

1. Mix the flours, baking soda, nutmeg, cloves, cinnamon, and salt. I mix them in the large stand mixer bowl because the wet ingredients will be mixed in later.

2. Mash the bananas in a medium bowl (I use a potato masher), and add the coconut oil, vanilla extract, almond extract, and eggs. Mix well.

3. Add the wet ingredients to the dry, and mix to form a batter. Don’t over-mix, or the almond flour will start to get oily. Fold in the walnuts, pineapple, and dates.

4. Pour into a 8.5″ x 4.5″ loaf pan lined with parchment paper. Use a spatula to smooth the batter out on top of the loaf.

5. Bake at 350 for 50-60 minutes (test with a knife to make sure it comes out clean). At the 45 minute mark, drizzle the honey over the top of the loaf and return to the oven for the remainder of baking time.

image

Posted in Better than store bought, Desserts, Food, Healthy Eating, Home made, Recipes | Tagged , , , , | Leave a comment

A Game of Chicken

Hey Friends,

Don’t worry- I’m not going to get all political on you. I’m just able to sit here and write this morning because I am on furlough. The week has actually been really nice. Lots of time to reflect, cook healthy meals for myself and Robby, and spend quality time with the dogs and chickens outside. Weather-wise, I couldn’t have picked a better week myself to be forced to stay home: lows in the 60s and highs around 80 in Atlanta. The A/C is off, the windows are open, and a gentle breeze is floating constantly through the house. Thank goodness we got most of our windows restored last year.

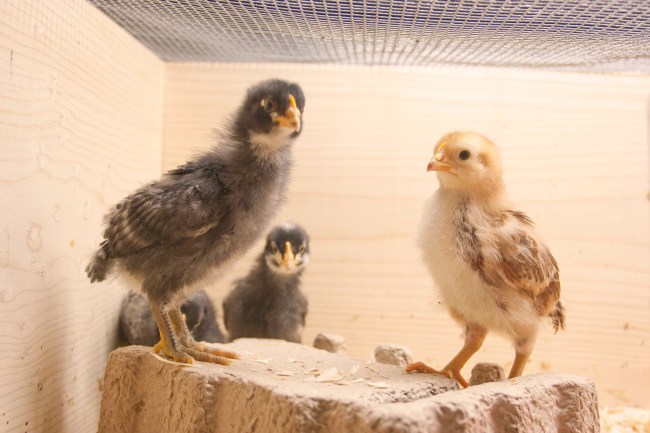
Since I’ve been home, and spending so much time with the chickens, I’ve been thinking about the constantly rising popularity of backyard flocks, and the associated public health concern of Salmonellosis. There’s a lot of information out there on this topic, some of it good, and some of it just mis-informed. If I haven’t mentioned it before, I’m a microbiologist at the CDC (a non-essential one, at that!). I do surveillance work on antimicrobial resistance in foodborne-associated bacteria, including Salmonella. Having been to a seminar recently on the topic of Salmonella outbreaks associated purely with backyard flocks, I thought I might share a few tidbits with you. The CDC website has some interesting statistical information as well.

Image

It’s not possible to know if your chickens carry Salmonella. It’s very common, and doesn’t harm the chickens, so you typically won’t see any outward signs if your chickens have this bacteria in their intestinal tract. It’s a normal part of a chicken’s flora. Some hatcheries vaccinate their flocks against a few harmful strains of Salmonella. In order to protect yourself and anyone that’s around your flock from an accidental infection, observe universal safety precautions by treating your chickens as though they do carry Salmonella. Wash your hands after collecting eggs or maintaining anything with the flock’s area (food, water, egg box, coop, perches, etc.).

Remember that chickens are not pets, they are farm animals. Avoid kissing or nuzzling them like a pet, and supervise children that are around your chickens. Chickens poop on the ground in their coops, and then they take dirt baths, so they can have fecal bacteria on them in places other than their cute little butts. One of the top ways that children under 5 contract Salmonella is from nuzzling animals like chickens (and turtles) that poop relentlessly. Kids are contstantly touching their own faces and putting things in their mouth. You can put two and two together.

IMG_6026

Wash your eggs and refrigerate them. There’s alot of debate on this, but I favor playing it safe and observing universal precautions. I’m always thinking about bacteria… I just can’t help it. It’s not that I’m paranoid or OCD or anything else, it’s just that there are alot of harmful bacteria out there that I don’t want invading my body. Here’s the thing: chicken biology is really simple, and their eggs come out of the same opening as their poop (the cloaca). There are traces of poop on the eggshells that you can sometimes see with your own eyes. You wouldn’t knowingly put vegetables with poop on them in your refrigerator (would you?), so why would you put unwashed eggs in your refrigerator along with all the other food you’re going to eat? Wash off the poopy bacteria, even if you can’t see any poop. There are some strains of Salmonella circulating that are really resistant to antibiotics, and can make you miserably sick if you get infected. The bacteria we’re dealing with today are not the same as what your grandparents had on their farms. They have different phenotypes and so many are not susceptible to the same drugs if you do get sick. Why not play it safe? Even if you cook your eggs thoroughly, you can still infect yourself by touching other things in your kitchen or house after touching poopy eggshells.

Pick your mail-order hatchery carefully. Many of the drug-resistant Salmonella infections have been linked to mail-order hatcheries, the companies that ship you baby chicks right after they hatch. Do some research before you order, and remember that the more chicks you order, the closer their quarters are while they’re being delivered to you, which equals cross-contamination opportunity.

20130413_075509

These were all take-away points from the seminar I attended, and points that I agree with as a microbiologist and a chicken keeper. Keeping a backyard flock is a perfectly safe hobby as long as you’re smart about it. We plan to keep chickens as long as we have the yard for it, and I hope the trend continues.

Thanks for reading!

Christy

Posted in Chickens, Garden, Healthy Eating | Tagged , , , , , | Leave a comment

How to Repair a Broken Plate Setter for your Big Green Egg

I recently made the careless mistake of leaning my Big Green Egg plate setter against my BGE stand while I was adding charcoal. I got sidetracked and left the area, returning through my fence gate. When I opened the gate, I knocked the plate setter over and it cracked cleanly in two. I saw it fall in slow motion. Anybody who’s broken something expensive knows that feeling. A replacement plate setter would cost me 65 bucks at the local Ace Hardware store and, since BGE stuff never really goes on sale, I was distraught.

It was a sad day. I know it looks gross. If yours isn't black from smoke, you're not using it enough.

It was a sad day. I know it looks gross. If yours isn’t black from smoke, you’re not using it enough.

I decided to try and fix the broken plate setter because, well, that’s what I do. If I can fix it cheaper, there’s no reason to buy something new. That’s part of what old house crazy means to me. I ended up being able to fix the broken plate setter for a total of about 20 bucks in parts. Here’s how:

Old House Crazy - DIY - Fix a Broken Big Green Egg Plate Setter - 02a

I started by purchasing the following stainless steel hardware: 2-8″ repair plates, 2-1.5″ machine screws with large washers, locking washers, and wing nuts. Stainless is expensive, but I didn’t want any metal coatings leaching into my food. I also purchased a masonry bit that matched the diameter of the screws. In total, I spent 21.08 at the hardware store.

Old House Crazy - DIY - Fix a Broken Big Green Egg Plate Setter - 03a

Once you’ve gotten your hardware, clamp the pieces of the plate setter together firmly. I used a band clamp, as shown in the photos.

Old House Crazy - DIY - Fix a Broken Big Green Egg Plate Setter - 04a

Once the plate setter is firmly clamped, place the repair plates across the crack and use them as a guide for drilling holes with the masonry bit. The ceramic that BGE uses to make their stuff drills very cleanly with a proper masonry bit. I wouldn’t recommend doing this with a standard wood or metal bit.

Old House Crazy - DIY - Fix a Broken Big Green Egg Plate Setter - 05a

After your holes are drilled, insert the screws through the holes and attach a large washer, then a lock washer, then the wing nut. Tighten the wing nuts firmly.

Old House Crazy - DIY - Fix a Broken Big Green Egg Plate Setter - 06a

After you’ve tightened the nuts, your plate setter is repaired. It should be fully functional again. I’ve used mine several times since I did the repair and it is working greatly. It still holds a full pan of water under my BBQ, so I haven’t lost any strength. I hope this post helps you save some money and continue to cook. If you’ve got any questions, send me an email at oldhousecrazy@gmail.com. Thanks for reading. -Robby

Posted in Big Green Egg, DIY, Food, Grill and Smoker, Tools and Techniques | 7 Comments