

Cost, Time, and Skills:
For this project, I used a thin piece of oak plywood ($10-$20) leftover from our stereo console rebuild, some chalkboard paint ($10 for a quart), and some cedar 1×2 lumber ($5-$10) for the frame. I used a router with a straight bit, clamps, a power drill/driver, and a circular saw. You could easily make your chalkboard without the frame and have your hardware store cut the plywood for you. This way, you won’t need ANY power tools. You could also simply paint an existing frame with chalkboard paint and this becomes a super easy project! As shown, this project took me 1-2 hours of work with several hours waiting for paint and primer to dry.
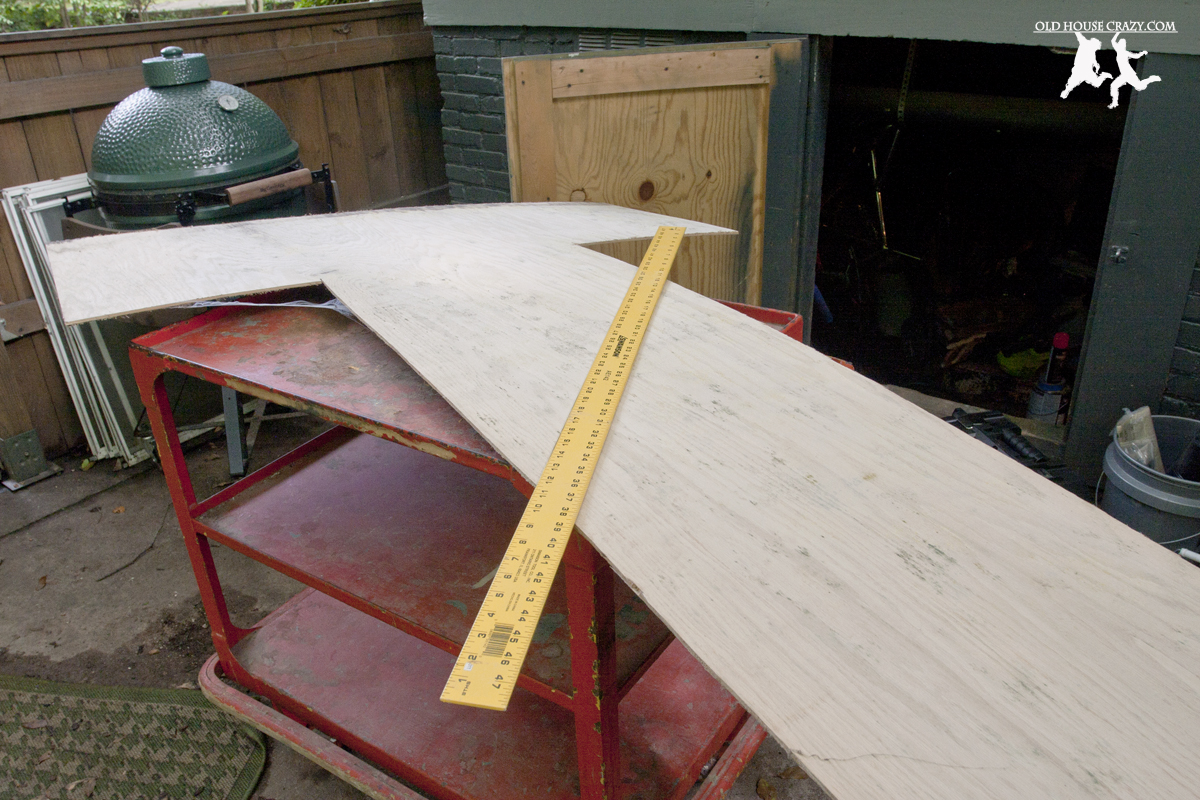
I had this piece of 1/4″ oak plywood leftover from our stereo console rebuild.
The Story:
Last year, Christy’s parents gave us a chest freezer for Christmas. One of the ways we like to save money and still eat well is to cook large cuts of meat and freeze meal-sized portions. This allows us to have tasty lunches and dinners during the work week without the effort a ham or roast beef would take. The chest freezer was a perfect gift because it allowed us more space to store our portions.

I cut the plywood to the size of the wall behind our freezer. You can make yours whatever size you want. That’s the great thing about making your own stuff.
The only problem with chest freezers is that you can easily lose food down in the cold darkness at the bottom. It really stinks when you find that last package of filets or chicken that you forgot you had and it’s all freezer-burned and gross. If only we had a way to keep track of all of the food that goes into the freezer. Enter the chalkboard menu.

I painted the plywood with a couple coats of primer before painting it with the chalkboard paint.
Instructions:
I began by cutting a piece of 1/4″ oak plywood into the dimensions of the wall above our chest freezer, minus space for the 2″ cedar frame I was going to put around the chalkboard. I sanded the front of the plywood and painted on a coat of primer before starting on the frame. The rest of the steps are found in the captions of the following photos.

I started the frame by clamping a cedar 1×2 to the edge of my workbench.
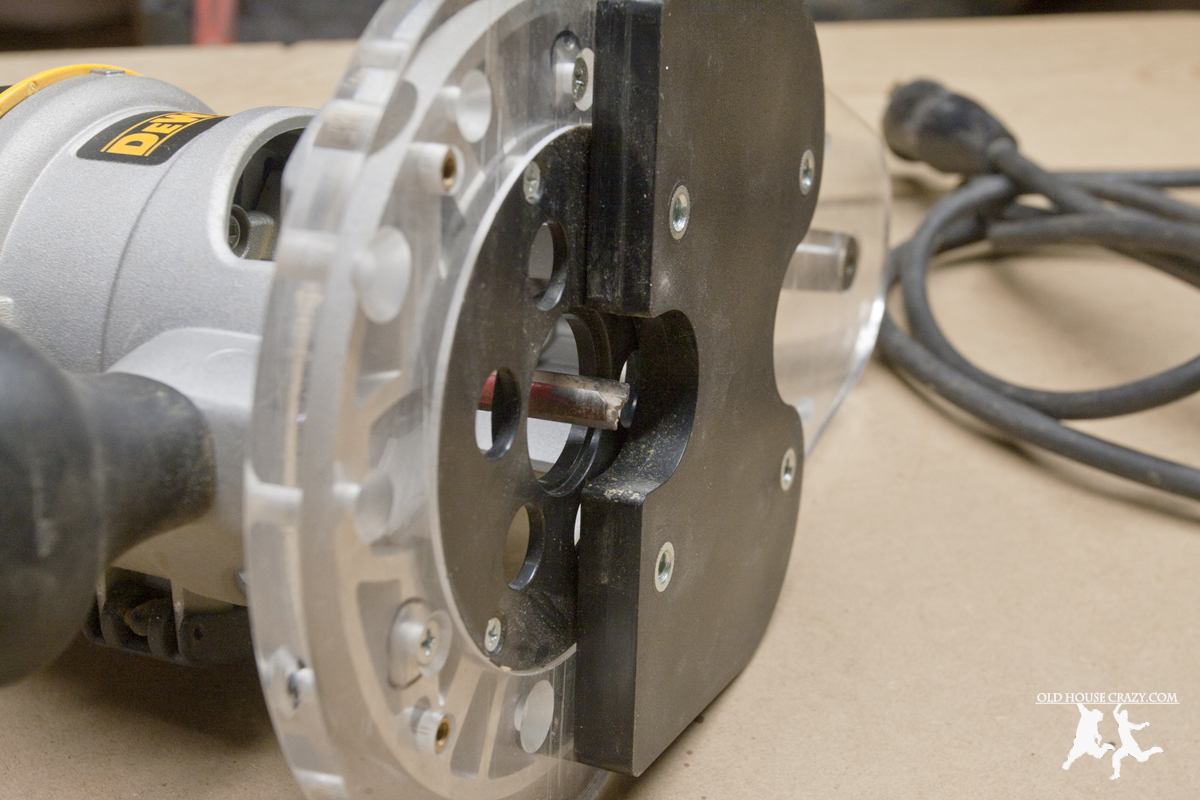
I cut out a groove in the side of the cedar 1×2 using a straight cutting bit and my router. When the frame is assembled, the oak panel will sit in the groove.

Here’s the groove.

I used a mitre saw to cut 45 degree angles in the cedar boards.

To assemble the frame, I clamped the corners, drilled pilot holes, and tapped in nails to hold the corners together.

Here’s the assembled frame. You can see the groove sized to hold the piece of oak plywood.

I placed the plywood into the groove and attached it using short wood screws.

The chalkboard menu attaches to the wall like any other photo or framed artwork.
In the months since we started using this chalkboard, we’ve done a much better job of planning meals and keeping track of what we’ve got in there. The hardest part is remembering to erase items from the chalkboard after you remove them from the freezer or changing the quantity. I hope this project is helpful to you as you look for ways to simplify your life. If you’ve got any questions or comments, leave them below or shoot us an email at oldhousecrazy@gmail.com. Thanks for reading. -Robby

This is SO cool!